Last Saturday, I was staring at a half-empty fridge, feeling that specific kind of mid-October exhaustion where you just want to order takeout but know you shouldn’t. The air outside had finally turned crisp, the kind that makes you crave warmth, comfort, and something sweet without feeling like you’re eating a brick. I had a block of cream cheese, a can of pumpkin puree, and a bag of graham crackers that were slowly losing their crunch. I decided to throw together a quick batch of bars instead of baking a whole pie. You know how pie crusts are? The enemy of weeknight sanity.
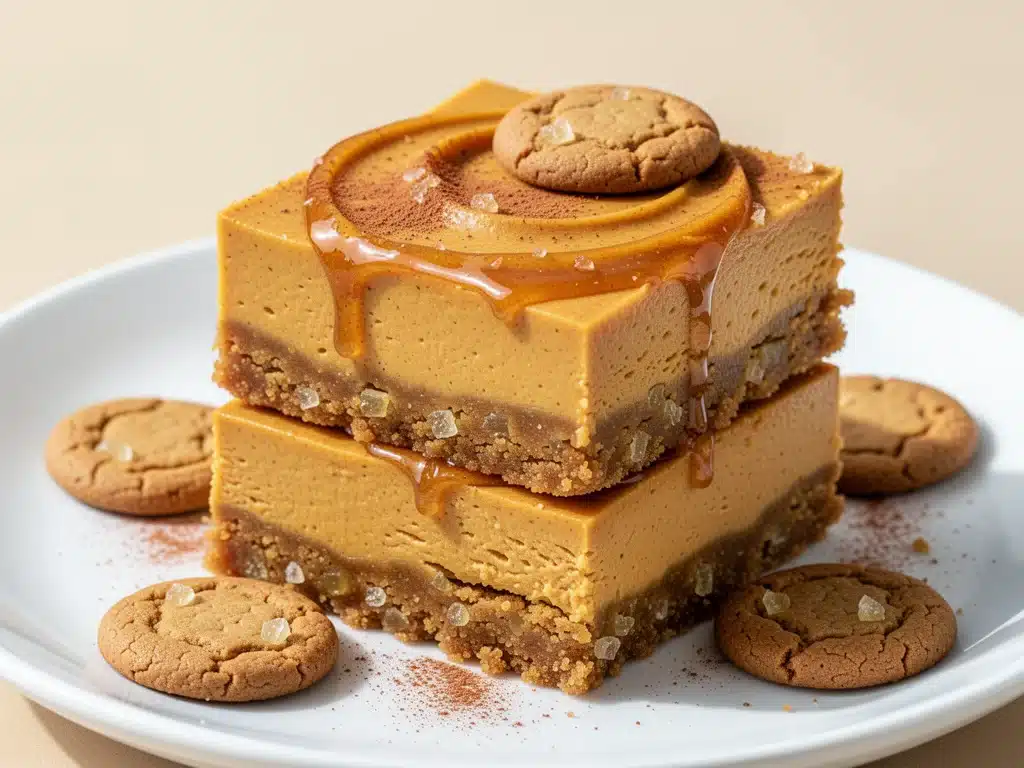
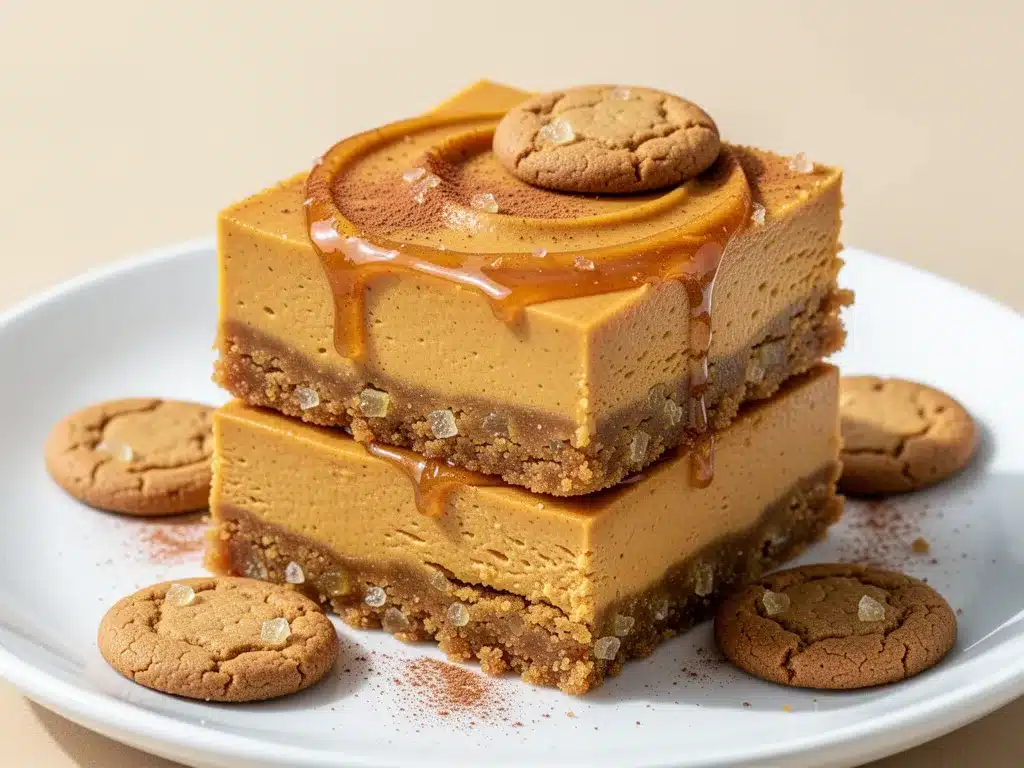
What came out of the oven wasn’t just edible. It was the kind of dessert that makes your family stop mid-chew and ask, “Did you buy these at the bakery?” These Early Fall Pumpkin Cheesecake Bars hit that perfect note between spicy warmth and rich, tangy creaminess. They’re denser than a mousse but lighter than a traditional cheesecake, with a crust that actually stays crisp even after sitting in the fridge for a day.
I’ve made these bars at least six times in the last two months. Six. Because they’re that good, and because they’re the ultimate solution for when you need a dessert that looks impressive but takes less than 45 minutes of hands-on time. Whether you’re hosting a small gathering or just need to soothe your own sweet tooth, these pumpkin cheesecake bars are the answer. They’re my go-to for early autumn evenings when the weather is unpredictable and I need a win in the kitchen.
Why You’ll Love This Recipe
There are about ten reasons I keep making these bars, but here are the big ones that keep them in my regular rotation.
Zero Pie Crust Stress — Let’s be real. I hate blind-baking pie crusts. I hate when they shrink. I hate when they get soggy. This recipe uses a simple pressed-in graham cracker crust that never fails. It’s sturdy, it’s sweet, and it requires zero rolling pins.
Lightning Fast Prep — If you can mix ingredients in a bowl, you can make this. The active time is maybe 20 minutes. The rest is just waiting for the oven and the fridge. I made these while helping my daughter with her math homework, and they were ready to eat by the time she finished her worksheet.
Perfectly Spiced — Nothing kills a pumpkin dessert faster than too much cinnamon or not enough ginger. I’ve tweaked this recipe to get the spice blend just right. It’s warm and aromatic without tasting like a spice jar. It tastes like fall.
Crowd-Pleaser — I’ve served these to my coffee-drinking aunt who thinks pumpkin is “too sweet” and my niece who usually only eats chocolate. They both went back for thirds. That’s the ultimate test.
Makes Amazing Leftovers — These actually taste better the next day. The flavors meld together overnight, and the texture firms up into something that feels like a premium confection. I deliberately make extra for Monday morning coffee.
Budget-Smart — You probably have most of these ingredients already. Pumpkin puree is cheap in the fall, cream cheese is a pantry staple, and graham crackers are inexpensive. This feeds 9-12 people for under $10.
This is my go-to when I need dessert to just work. No complicated techniques, no weird ingredients, just reliable, delicious food that makes everyone happy.
Ingredients You’ll Need
Here’s the best part: you probably have most of this already. The beauty of these bars is how few ingredients you need to make something taste incredibly complex.
For the Crust:
Graham Crackers (2 cups / 200g, crushed) — I use the standard honey graham crackers. If you want a slightly more sophisticated flavor, you can use digestive biscuits or even shortbread cookies, but graham crackers are the classic choice. Process them in a food processor until they look like wet sand.
Unsalted Butter (6 tablespoons / 85g, melted) — This binds the crust. Use real butter, not margarine. The flavor makes a difference here. Melt it in the microwave or a small saucepan.
Granulated Sugar (2 tablespoons / 25g) — Just a little bit to sweeten the crust and help it crisp up. Don’t skip this, or the crust will taste bland.
Pinch of Salt — Always add a pinch of salt to sweet crusts. It balances the sugar and enhances the graham cracker flavor.
For the Filling:
Full-Fat Cream Cheese (24 oz / 680g, 2 blocks) — This is the most important ingredient. Do not use low-fat or whipped cream cheese. It needs to be the solid blocks from the refrigerated section. Let it sit on the counter for 30 minutes before you start. Cold cream cheese creates lumps, and nobody wants lumpy cheesecake.
Granulated Sugar (1 cup / 200g) — Standard white sugar works best for structure. Brown sugar can make it too moist, though you can swap half if you want a deeper flavor.
Heavy Cream (½ cup / 120ml) — This adds richness and helps the filling set smoothly. Half-and-half works in a pinch, but heavy cream gives that luxurious mouthfeel.
Large Eggs (3 large) — Room temperature eggs are crucial. Cold eggs can cause the cheesecake to crack or bake unevenly. I take them out of the fridge right when I start melting the butter for the crust.
Pumpkin Puree (15 oz / 425g, 1 can) — Make sure you buy pure pumpkin puree, NOT pumpkin pie filling. Pie filling has sugar and spices already added, which will ruin the balance of this recipe. Look for the can labeled “100% Pure Pumpkin.”
For the Spice Blend:
Cinnamon (1 teaspoon) — The backbone of the flavor.
Ginger (½ teaspoon, ground) — Adds a little zing. If you don’t have it, you can skip it, but it’s worth having.
Nutmeg (¼ teaspoon, freshly grated if possible) — Just a hint. Too much nutmeg tastes medicinal.
Vanilla Extract (1 teaspoon) — Pure vanilla, not imitation. It rounds out all the spices.
Optional Topping:
Caramel Sauce — Drizzle it on right before serving. It adds a salty-sweet contrast that is absolutely divine. I keep a jar of salted caramel in the fridge specifically for these bars.
Equipment Needed
You don’t need fancy equipment for this. Here’s what I actually use.
9×9 Inch Baking Pan — This is the perfect size for these bars. It gives you nice thick squares. A 9×13 pan will work, but the bars will be thinner and harder to cut cleanly. If you only have a 9×13, just double the recipe.
Food Processor or Blender — For crushing the graham crackers quickly and evenly. If you don’t have one, put the crackers in a zip-top bag and crush them with a rolling pin. It takes longer but works fine.
Hand Mixer or Stand Mixer — You need to beat the cream cheese until it’s completely smooth. Doing this by hand is possible but tiring. A mixer makes it easy.
Spatula — For scraping down the sides of the bowl and smoothing the top of the batter.
Cooling Rack — Essential for letting the bars cool gradually so they don’t crack.
Plastic Wrap or Aluminum Foil — For lining the pan. I like to leave an overhang on the sides so I can lift the whole block out of the pan once it’s set. This makes cutting much cleaner.
How to Make It: Step-by-Step
Alright, let’s make this! I’m walking you through exactly how I do it, including the little tricks I’ve picked up to ensure a crack-free, creamy result.
Step 1: Prep Your Pan and Oven (5 minutes)
Preheat your oven to 350°F (175°C). Line your 9×9 inch baking pan with parchment paper or foil, leaving an overhang on the long sides. This is your handle for lifting the bars out later. Lightly spray the bottom with non-stick spray.
Step 2: Make the Crust (5 minutes)
In a medium bowl, combine the crushed graham crackers, melted butter, 2 tablespoons of sugar, and a pinch of salt. Mix until it looks like wet sand. Press this mixture firmly into the bottom of your prepared pan. Use the bottom of a measuring cup to pack it down tight. You want it even and compact. Bake for 8-10 minutes until it smells toasty and looks slightly darker. Remove from the oven and let it cool while you make the filling. Do not turn off the oven.
Step 3: Beat the Cream Cheese (3 minutes)
In a large mixing bowl, beat the softened cream cheese on medium speed until it is completely smooth and creamy. This is critical. Scrape down the sides of the bowl and beat for another minute. If there are any lumps, they will show up in the final product. The mixture should look like frosting.
Step 4: Add Sugar and Spices (2 minutes)
Add the 1 cup of sugar, cinnamon, ginger, nutmeg, and vanilla extract to the cream cheese. Mix on low speed until just combined. Scrape the bowl again. You want everything incorporated, but don’t overmix once you add the eggs.
Step 5: Incorporate Eggs and Pumpkin (3 minutes)
Add the eggs one at a time, mixing on low speed just until the yellow disappears. Overmixing at this stage incorporates too much air, which can cause the cheesecake to rise and then crack as it cools. Finally, add the pumpkin puree. Mix on low until smooth and uniform in color. The batter should be thick, orange, and smooth.
Step 6: Bake the Bars (25-30 minutes)
Pour the batter over the cooled crust. Smooth the top with a spatula. Bake for 25-30 minutes. The edges should be set and slightly puffed, but the center should still have a slight jiggle when you gently shake the pan. It will firm up as it cools. Do not overbake, or it will become dry and crumbly.
Step 7: Cool Completely (2 hours)
Turn off the oven and crack the door open slightly. Let the bars sit in the oven for 30 minutes to cool gradually. This helps prevent cracking. Then, remove them and let them cool completely on a wire rack at room temperature. Once cool, cover with plastic wrap and refrigerate for at least 4 hours, preferably overnight. This chilling time is what gives them that dense, creamy texture.
Step 8: Cut and Serve
Lift the bars out of the pan using the foil overhang. Use a sharp knife to cut into squares. Wipe the knife clean between cuts for neat edges. Drizzle with caramel sauce if desired. Serve chilled.
Expert Tips & Tricks
Here’s everything I’ve learned from making these dozens of times. These tips will save you from my mistakes.
Room Temperature is Non-Negotiable
I cannot stress this enough. If your cream cheese is cold, you will get lumps. If your eggs are cold, your batter might separate. Take everything out of the fridge an hour before you start. If you’re short on time, you can microwave the cream cheese in 10-second bursts, but be careful not to melt it.
Don’t Overmix the Batter
Once you add the eggs, mix gently. You want to incorporate them, not whip air into the mixture. Air bubbles expand in the oven and then collapse, leading to cracks. A little crack is fine—it’s rustic—but big cracks mean you overmixed.
The Jiggle Test
Many people pull cheesecake out too early because they’re scared of underbaking. Trust the jiggle. The center should move like Jell-O, not slosh like water. It will set as it cools. If it’s firm when it comes out, it’s overbaked and will be dry.
Chill Overnight
I know it’s tempting to eat them right out of the fridge after 2 hours. But wait. The flavors need time to meld, and the texture needs time to set. The overnight chill makes the difference between a “good” bar and a “great” bar.
Sharp Knife for Cutting
Use a sharp chef’s knife. Dip it in hot water and wipe it dry between cuts. This gives you clean, professional-looking squares. A dull knife will squish the bars and make the crust crumble.
Common Mistakes (and how to avoid them):
Mistake: Cracked Top
Fix: This usually happens from overmixing or cooling too quickly. Let the bars cool in the turned-off oven with the door cracked. Also, ensure your cream cheese is room temperature.
Mistake: Soggy Crust
Fix: Make sure you pre-bake the crust for 8-10 minutes. This sets the butter and creates a barrier against the wet filling. Also, don’t skip the salt in the crust.
Mistake: Dense and Heavy
Fix: This is actually desired for cheesecake bars, but if it’s like a brick, you might have overbaked it or used low-fat cream cheese. Stick to full-fat and check the jiggle.
Variations & Substitutions
Once you’ve nailed the basic version, here’s how you can mix it up. I’ve tried all of these.
Chocolate Chip Pumpkin Bars
Stir ½ cup of mini chocolate chips into the batter before baking. The chocolate pairs amazingly with the pumpkin spices. It’s like a pumpkin cookie meets cheesecake.
Maple Pecan Swirl
Whisk 2 tablespoons of maple syrup with ½ teaspoon of cinnamon. Drizzle this over the batter and swirl it with a knife before baking. Top with chopped pecans for crunch. This is my favorite variation for holiday gatherings.
Gluten-Free Version
Use gluten-free graham crackers (like Kinnickinnic or Simple Mills) and ensure your pumpkin puree is certified gluten-free (some brands process in facilities with wheat). Everything else is naturally gluten-free.
Dairy-Free Option
Replace the cream cheese with a high-quality vegan cream cheese block (like Kite Hill or Treeline). Use coconut milk creamer instead of heavy cream, and dairy-free butter for the crust. The texture will be slightly different but still delicious. My dairy-free friend loved these.
Spice It Up
Add ½ teaspoon of cardamom or a pinch of cloves for a more complex spice profile. Or add ¼ teaspoon of cayenne pepper for a subtle kick that contrasts with the sweetness.
Different Crusts
Instead of graham crackers, try crushed vanilla wafers for a sweeter, milder crust. Or use crushed ginger snaps for a spicier, darker crust that complements the pumpkin well.
Serving & Storage
How to Serve:
I usually serve these straight from the fridge. They are best cold. But here are other ways I’ve enjoyed them:
Side Dishes:
- Whipped Cream — A dollop of freshly whipped cream with a little orange zest on top.
- Apple Slices — Thinly sliced crisp apples on the side add freshness.
- Coffee — Obviously. This pairs perfectly with a strong black coffee or a latte.
Storage Instructions:
Refrigerator:
Store in an airtight container for up to 5 days. The bars will keep their texture and flavor well. I keep them in the pan, covered tightly with plastic wrap, in the fridge.
Freezing:
Yes, you can freeze these! Wrap individual bars tightly in plastic wrap, then in aluminum foil. They will keep for up to 2 months. Thaw in the fridge overnight before serving. They taste almost as good as fresh.
Reheating:
You don’t need to reheat these. They are best served cold. If you prefer them room temperature, let them sit out for 15 minutes before eating.
Pro Tip:
If you’re making these for a party, cut them into smaller bites (2×2 inches). They disappear fast, and small pieces are easier for guests to eat without making a mess.
Nutrition Information
I’m not a nutritionist, but here’s the breakdown if you’re tracking. These are indulgent bars, so enjoy them in moderation.
Per Serving (based on 12 bars):
- Calories: 280
- Protein: 6g
- Carbs: 32g
- Fiber: 1g
- Sugar: 22g
- Fat: 16g
- Saturated Fat: 9g
- Cholesterol: 65mg
- Sodium: 220mg
What’s Good:
- Decent protein from the cream cheese and eggs.
- Pumpkin adds a bit of vitamin A.
- Easy to portion control.
What to Know:
- Higher in sugar and saturated fat due to cream cheese and butter.
- Contains dairy and gluten.
- Calorie count can vary if you add caramel or chocolate chips.
My Take:
Look, these are dessert bars. They’re meant to be enjoyed. The pumpkin adds some nutritional value, but let’s not kid ourselves—they’re a treat. I usually eat one square with my morning coffee and call it a day. It satisfies the sweet tooth without leaving you feeling sluggish.
Final Thoughts
So that’s my Early Fall Pumpkin Cheesecake Bars! I’ve probably talked your ear off at this point, but when you make a recipe this often, you have a lot to say about it. These bars have saved my dessert game more times than I can count. They’re my answer to “what’s for dessert” when I’m tired, don’t want to bake a whole pie, and still want something that tastes really good. My kids are happy, my husband’s happy, and I’m happy because I’m not stressed about cooking.
Make it yours! Try different spice blends, add chocolate chips, or drizzle with caramel. The best recipes are the ones you adapt to your family’s tastes. If you make this, drop a comment and let me know what you think! I love hearing how recipes turn out in your kitchen. And if something doesn’t work, tell me that too—I’m here to help troubleshoot.
Happy baking! And I hope your kitchen smells half as good as mine does right now.
Frequently Asked Questions
Can I use pumpkin pie filling instead of pure pumpkin puree?
No, please don’t. Pumpkin pie filling already has sugar, spices, and thickeners added. If you use it, your bars will be overly sweet, too soft, and might not set properly. You need the plain, unsweetened pure pumpkin puree from the can. It’s a different product entirely.
Why did my cheesecake bars crack on top?
Cracking is usually caused by overmixing the batter (which incorporates air) or cooling the bars too quickly. Make sure your cream cheese is room temperature before mixing, and don’t beat the eggs in vigorously. Also, let the bars cool in the turned-off oven with the door cracked open for 30 minutes. This gradual cooling helps prevent cracks.
Can I make these ahead of time?
Absolutely! These bars actually taste better the next day. You can make them 2-3 days in advance and store them in the fridge. They also freeze well for up to 2 months. I usually make them on Sunday for the week ahead.
Can I use a 9×13 pan instead of a 9×9 pan?
Yes, but the bars will be thinner. You can use the same recipe, but you’ll need to reduce the baking time to about 20-25 minutes. Keep an eye on them so they don’t dry out. Thinner bars are easier to cut but might be less rich.
How do I store leftover bars?
Store them in an airtight container in the refrigerator for up to 5 days. If you want to freeze them, wrap individual bars tightly in plastic wrap and then in foil. They will keep for up to 2 months. Thaw in the fridge overnight.
Can I make these gluten-free?
Yes! Just use gluten-free graham crackers for the crust. Make sure your pumpkin puree is certified gluten-free, as some brands process in facilities with wheat. The rest of the ingredients are naturally gluten-free.
What if I don’t have a food processor to crush the crackers?
No problem! Put the graham crackers in a heavy-duty zip-top bag and crush them with a rolling pin or a heavy pan. It takes a few minutes, but you’ll get the same fine crumbs needed for a good crust.
Pin This Recipe!
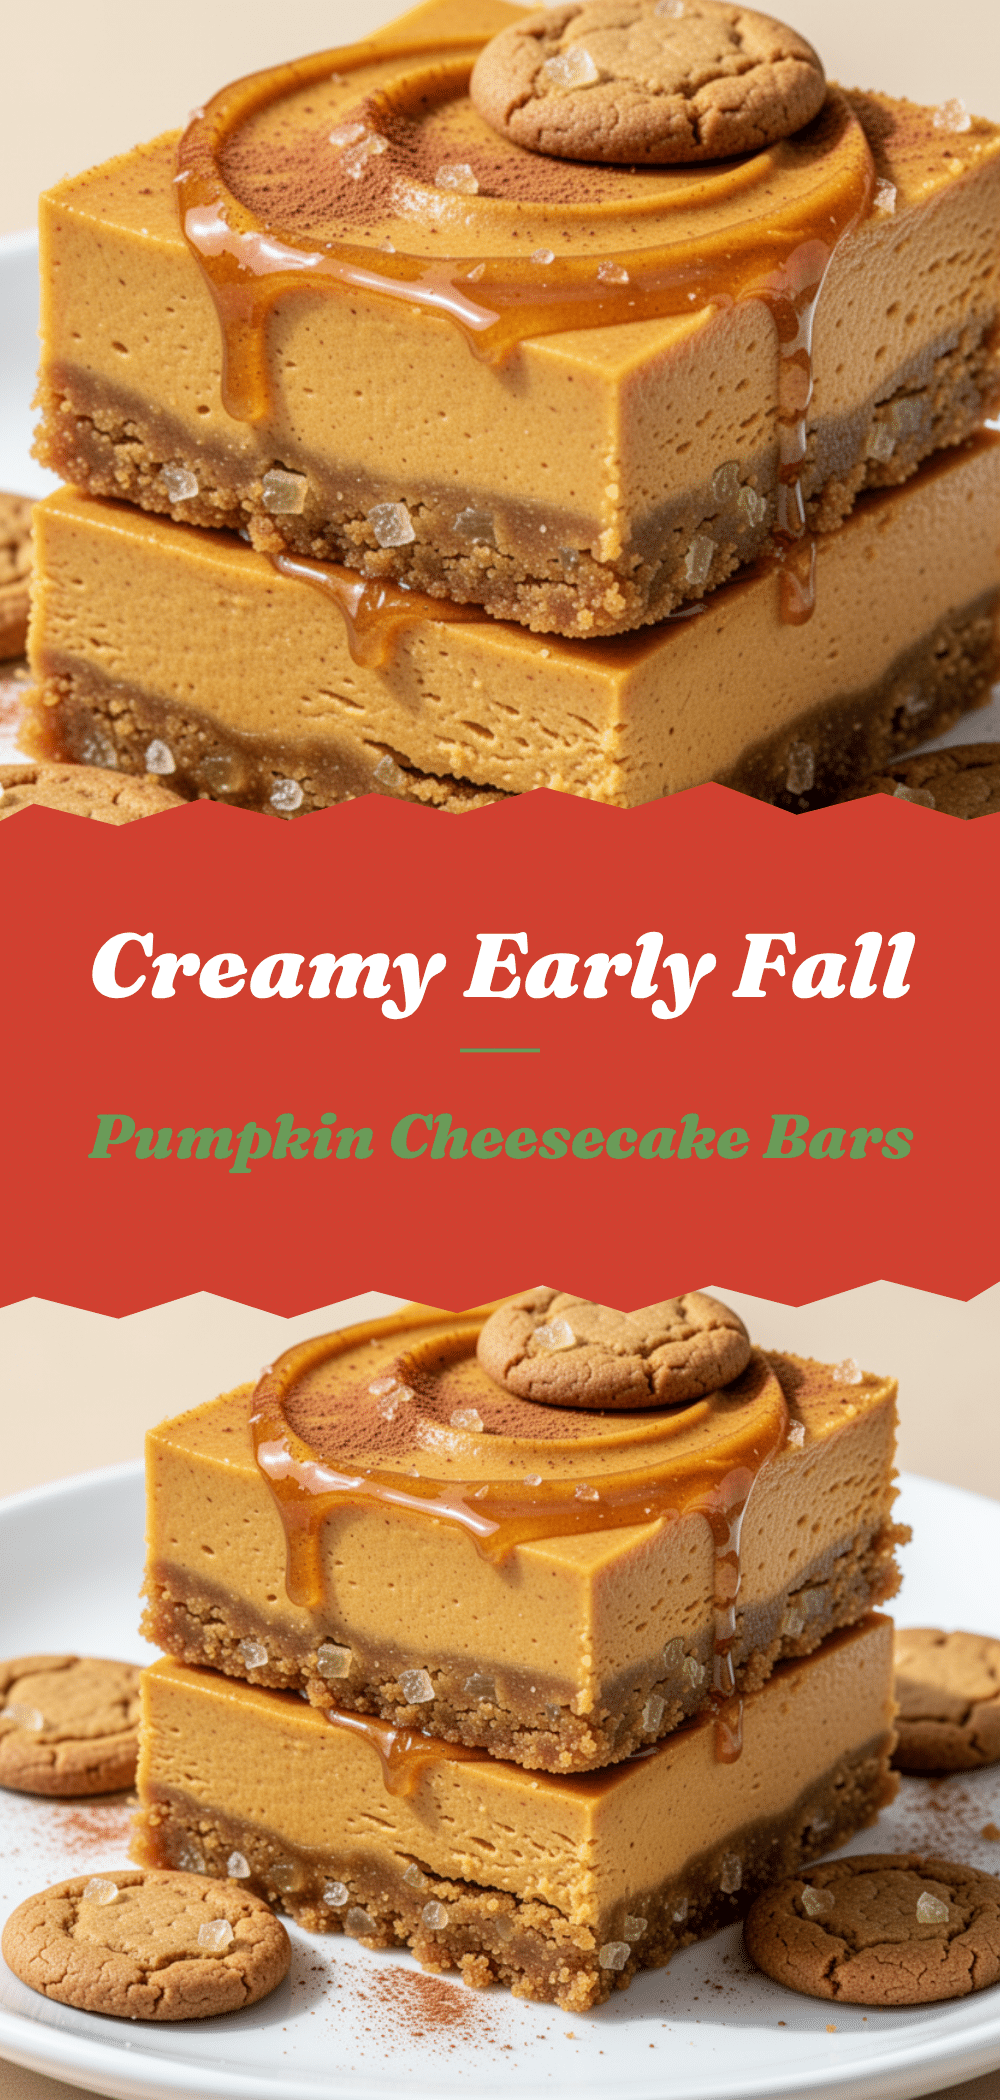
Early Fall Pumpkin Cheesecake Bars
- Total Time: 60 minutes
- Yield: 12 servings 1x
Description
These easy pumpkin cheesecake bars feature a crisp graham cracker crust and a rich, spiced cream cheese filling. They are denser than mousse but lighter than traditional cheesecake, offering a perfect balance of spicy warmth and tangy sweetness.
Ingredients
- 2 cups (200g) crushed graham crackers
- 6 tablespoons (85g) unsalted butter, melted
- 2 tablespoons (25g) granulated sugar
- 1 pinch salt
- 24 oz (680g) full-fat cream cheese, softened
- 1 cup (200g) granulated sugar
- 1 teaspoon ground cinnamon
- 1/2 teaspoon ground ginger
- 1/4 teaspoon nutmeg
- 1 teaspoon vanilla extract
- 3 large eggs, room temperature
- 15 oz (425g) pure pumpkin puree
- 1/2 cup (120ml) heavy cream
Instructions
- Preheat oven to 350°F (175°C). Line a 9×9 inch baking pan with parchment paper or foil, leaving an overhang on the sides, and lightly spray with non-stick spray.
- In a medium bowl, combine crushed graham crackers, melted butter, 2 tablespoons sugar, and a pinch of salt. Mix until it resembles wet sand.
- Press the crust mixture firmly into the bottom of the prepared pan. Bake for 8-10 minutes until toasted and slightly darker. Remove and let cool while making the filling.
- In a large mixing bowl, beat the softened cream cheese on medium speed until completely smooth and creamy. Scrape down the sides and beat for another minute.
- Add 1 cup sugar, cinnamon, ginger, nutmeg, and vanilla extract to the cream cheese. Mix on low speed until just combined.
- Add eggs one at a time, mixing on low speed just until the yellow disappears. Do not overmix.
- Add the pumpkin puree and heavy cream. Mix on low until smooth and uniform in color.
- Pour the batter over the cooled crust and smooth the top with a spatula.
- Bake for 25-30 minutes. The edges should be set and slightly puffed, but the center should have a slight jiggle.
- Turn off the oven and crack the door open. Let the bars sit in the oven for 30 minutes to cool gradually.
- Remove from the oven and let cool completely on a wire rack at room temperature.
- Cover with plastic wrap and refrigerate for at least 4 hours, preferably overnight.
- Lift the bars out of the pan using the foil overhang. Cut into squares and serve chilled.
Notes
Ensure cream cheese and eggs are at room temperature to prevent lumps and cracking. Do not use pumpkin pie filling; use 100% pure pumpkin puree. For clean cuts, dip a sharp knife in hot water and wipe dry between cuts. The bars taste better after chilling overnight.
- Prep Time: 20 minutes
- Cook Time: 40 minutes
- Category: Dessert
- Cuisine: American
Nutrition
- Serving Size: 1 bar
- Calories: 280
- Sugar: 22
- Sodium: 220
- Fat: 16
- Saturated Fat: 9
- Carbohydrates: 32
- Fiber: 1
- Protein: 6
Keywords: pumpkin cheesecake bars, fall dessert, easy pumpkin recipe, graham cracker crust, cream cheese bars, autumn baking