Last year, I was tasked with bringing dessert to our neighborhood Labor Day BBQ. You know the drill. It’s that last day of summer when the air is still thick and humid, everyone is wearing sunglasses, and the grill is smoking. I decided to make a classic banana split sundae in a cup. It seemed cute. It seemed manageable. It was a disaster.
By the time I got to the park, the bananas had browned, the whipped cream had deflated into sad little mounds, and the chocolate sauce had melted into a puddle at the bottom of the plastic cups. Half the guests didn’t even touch them. I stood there holding a tray of soggy, melting mess, feeling like a total failure. That was the year I learned that party desserts need structure. They need to survive the heat. They need to be grab-and-go.
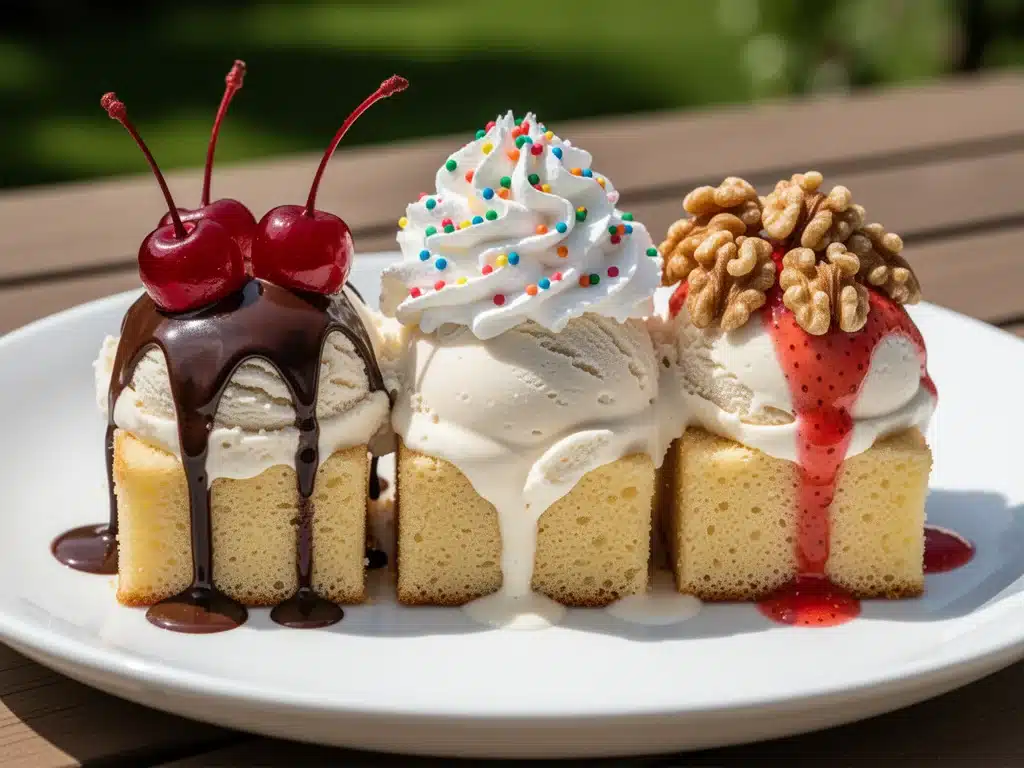
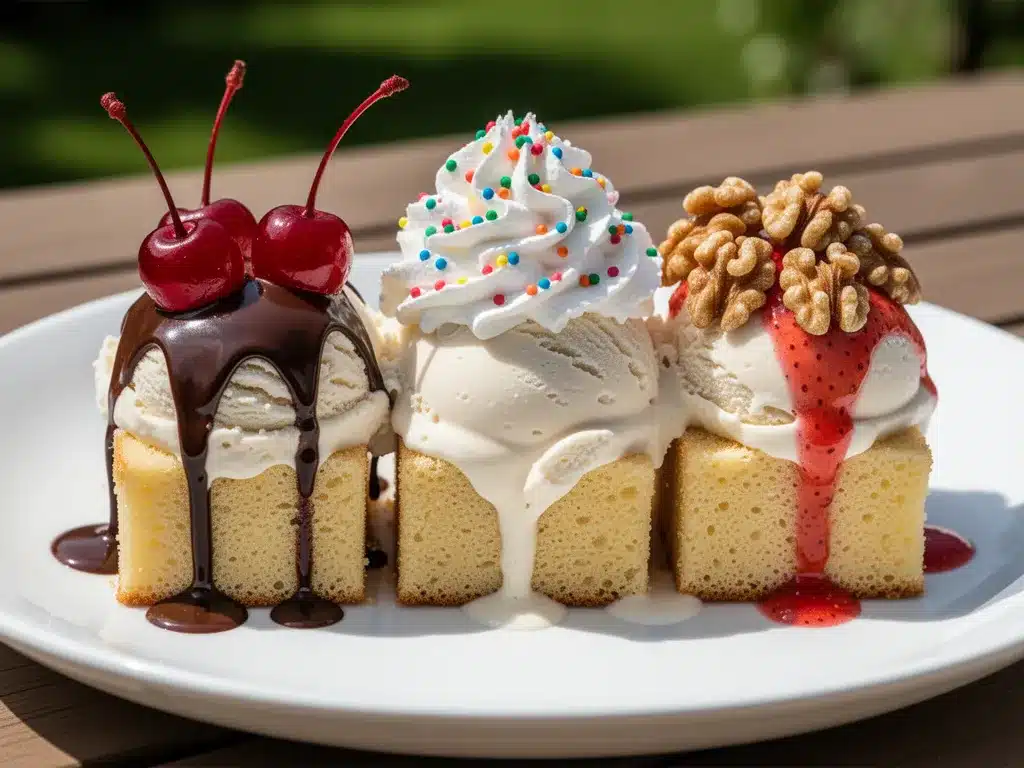
That’s when I started tinkering with the idea of Labor Day Banana Split Dessert Bars. I wanted all the nostalgia of a banana split—the bananas, the cherries, the chocolate, the whipped cream—but in a form that wouldn’t fall apart. After five failed attempts (one involved too much banana moisture that turned the crust into mush), I finally cracked it. These bars are sturdy, they hold their shape even in a warm car trunk, and they taste like summer.
I’ve made these for three Labor Day parties now, and they’ve become the star of every picnic. People ask for the recipe before they even take a bite. They’re easy to make, require minimal cleanup, and look stunning on a platter. If you’re looking for a way to end your summer gatherings on a high note, these dessert bars are your answer. Let’s get baking.
Why You’ll Love This Recipe
There’s a reason these Labor Day Banana Split Dessert Bars have taken over my weekend routine. They solve the biggest problem with summer parties: temperature. Unlike ice cream sundaes or layered parfaits, these bars are room-temperature stable for hours. Here’s why they’re worth the 30 minutes it takes to make them:
- They Actually Hold Together — The secret is a shortbread-like crust that stays crisp even when topped with fresh fruit. I’ve left these out on a patio table in 85-degree weather for two hours, and they didn’t droop once.
- Zero Melting Stress — No ice cream to keep frozen. No whipped cream to deflate. Just solid, delicious layers that travel well. Perfect for tailgates, beach days, or poolside lounging.
- Nostalgia in Every Bite — They capture that specific childhood joy of a banana split without the mess. The combination of buttery crust, sweet banana filling, chocolate drizzle, and a maraschino cherry on top is pure comfort.
- Make-Ahead Friendly — You can make these up to three days in advance. In fact, I find they taste even better the next day when the flavors have had time to meld. I often bake them on Sunday for a Monday party.
- Customizable for Crowds — Need a gluten-free version? Swap the flour. Want less sugar? Use dark chocolate. These bars are a canvas for your creativity, and everyone at the party can find something they love.
Real talk: making dessert for a crowd usually means buying something from the store. But there’s something special about pulling out a tray of homemade bars that look as good as these. They signal effort, care, and a bit of fun. Plus, they’re way cheaper than catering a dessert table.
Ingredients You’ll Need
This recipe looks like it has a lot of parts, but it’s mostly pantry staples. I’m particular about a few things here, so let’s break down what you need and why.
For the Crust
Unsalted butter (½ cup / 113g, softened) — This is the foundation. Softened butter creams easily with the sugar. Don’t use salted butter unless you reduce the added salt, as it can throw off the balance.
Granulated sugar (¼ cup / 50g) — Not too much, just enough to give the crust a slight sweetness and crispness. It helps create that shortbread texture.
All-purpose flour (1 cup / 125g) — Standard flour works best. If you’re gluten-free, use a 1:1 gluten-free flour blend. I’ve tested King Arthur Measure for Measure, and it works perfectly.
Salt (¼ teaspoon) — Just a pinch to enhance the buttery flavor.
For the Banana Layer
Ripe bananas (2 medium, mashed / about 1 cup) — This is crucial. Use bananas that are heavily spotted with brown. They’re sweeter and easier to mash. If they’re green, they’ll taste starchy and bland. I usually buy a bunch of bananas and let them sit on the counter for a few days until they’re perfect.
Heavy cream (½ cup / 120ml) — This adds richness and helps bind the banana mixture. Don’t skip it for a lighter milk; you’ll lose the creamy texture. If you want to use creamy iced matcha latte ingredients as a flavor inspiration, you could swap the cream for a whipped cream cheese mixture, but that’s a different recipe entirely.
Vanilla extract (1 teaspoon) — Pure vanilla makes a huge difference. I use Nielsen-Massey, but any good quality vanilla works.
Cornstarch (1 tablespoon) — This is the stabilizer. It prevents the banana layer from becoming watery. Without it, the bars might be soggy. Trust me on this one.
For the Toppings
Chocolate chips (½ cup / 85g) — Semi-sweet or milk chocolate. I prefer semi-sweet to balance the sweetness of the bananas. Melt these with a teaspoon of coconut oil for a smoother drizzle.
Maraschino cherries (1 jar) — The classic banana split cherry. Drain them well, or pat them dry with a paper towel. Excess moisture can make the topping slide off.
Whipped cream (optional) — Freshly whipped cream is best, but store-bought works in a pinch. If you’re making these ahead, add the whipped cream just before serving.
Crushed nuts (optional) — Walnuts or pecans add a nice crunch. I usually skip them for simplicity, but they’re a great addition if you like texture.
Shopping Shortcuts
I buy pre-mashed bananas when I’m in a rush, but fresh tastes better. If you use frozen bananas, thaw them completely and drain any excess liquid. Also, I keep a jar of maraschino cherries in the pantry just for this recipe. It’s worth it.
Equipment Needed
You don’t need fancy equipment for this. Here’s what I actually use:
8×8 inch baking pan — This is the standard size for bar cookies. Line it with parchment paper for easy removal. I use a square pan because it gives the bars a nice, dense texture.
Hand mixer or stand mixer — For creaming the butter and sugar. A fork works, but it takes forever. I use my hand mixer because it’s fast and efficient.
Spatula — For spreading the banana layer. A rubber spatula is best because it scrapes the bowl clean.
Saucepan or microwave-safe bowl — For melting the chocolate chips. I prefer the microwave in 30-second intervals, stirring in between. It’s faster and less messy than a saucepan.
Parchment paper — Essential for easy removal. I line the pan with a cross of parchment paper, leaving overhang on two sides. This acts as a sling to lift the bars out.
Knife — For slicing. I use a sharp chef’s knife and wipe it clean between cuts for neat slices.
How to Make It: Step-by-Step
Alright, let’s make these Labor Day Banana Split Dessert Bars! I’m walking you through exactly how I do it, including the little tricks I’ve picked up over the years.
Step 1: Prep the Pan (5 minutes)
Preheat your oven to 350°F (175°C). Line an 8×8 inch baking pan with parchment paper, leaving an overhang on two sides. This is crucial for removing the bars later. Grease the parchment lightly with butter or cooking spray.
Step 2: Make the Crust (5 minutes)
In a mixing bowl, cream together the softened butter and granulated sugar until light and fluffy. This takes about 2-3 minutes with a hand mixer. Add the flour and salt, and mix until just combined. The mixture will look crumbly. Press it firmly into the bottom of the prepared pan. Use the bottom of a measuring cup to press it down evenly. This ensures a solid base that won’t crumble apart.
Step 3: Bake the Crust (10 minutes)
Bake the crust for 10 minutes. It should be lightly golden around the edges. Remove from the oven and let it cool for 5 minutes. While it cools, prepare the banana layer.
Step 4: Make the Banana Filling (5 minutes)
In a medium bowl, mash the ripe bananas until smooth. Add the heavy cream, vanilla extract, and cornstarch. Whisk until well combined. The mixture will be thin, but that’s okay. The cornstarch will thicken it in the oven.
Step 5: Assemble and Bake (20 minutes)
Pour the banana mixture over the warm crust. Spread it evenly with a spatula. Bake for 20 minutes, or until the banana layer is set and lightly golden on top. The center should be firm, not jiggly. Remove from the oven and let it cool completely in the pan. This step is important; if you cut them while warm, they’ll fall apart.
Step 6: Add the Toppings (10 minutes)
Once the bars are completely cool, melt the chocolate chips in the microwave in 30-second intervals, stirring in between. Drizzle the melted chocolate over the top of the bars in a zigzag pattern. Top with drained maraschino cherries and, if using, a dollop of whipped cream and crushed nuts. I usually add the whipped cream just before serving to keep it fresh.
Step 7: Slice and Serve
Use the parchment paper to lift the bars out of the pan. Place them on a cutting board and slice into 12-16 squares. Serve immediately or store in the refrigerator until ready to serve.
Expert Tips & Tricks
Here’s everything I’ve learned from making these dozens of times. These tips will save you from my mistakes.
- Use Ripe Bananas — This is non-negotiable. Brown-spotted bananas are sweeter and easier to mash. If your bananas are green, put them in a paper bag with an apple for a few days to ripen them faster.
- Don’t Skip the Cornstarch — It’s the stabilizer that prevents the banana layer from becoming watery. Without it, the bars might be soggy.
- Cool Completely — I know it’s tempting to cut them early, but they need to set. If you cut them warm, the layers will shift. Patience pays off.
- Drain the Cherries — Excess moisture from the cherries can make the topping slide off. Pat them dry with a paper towel before adding.
- Chocolate Drizzle Trick — If your chocolate is too thick to drizzle, add a teaspoon of coconut oil. It thins it out and gives it a nice shine.
Variations & Substitutions
Once you’ve nailed the basic version, here’s how you can mix it up. I’ve tried all of these.
- Gluten-Free — Use a 1:1 gluten-free flour blend for the crust. Everything else is naturally gluten-free.
- Dairy-Free — Use vegan butter for the crust and coconut cream instead of heavy cream. Use dairy-free chocolate chips for the drizzle.
- Strawberry Banana Split — Swap the chocolate drizzle for a strawberry sauce. Blend fresh strawberries with a little sugar and lemon juice.
- Chocolate Chip Banana — Add ½ cup of chocolate chips to the banana layer before baking. It adds extra chocolatey goodness.
- Caramel Drizzle — Swap the chocolate for a salted caramel drizzle. It’s a game-changer.
Serving & Storage
How to Serve
I usually serve these at room temperature, but they’re also delicious chilled. For a party, I arrange them on a platter with a few extra cherries and a small bowl of whipped cream on the side. Guests can add their own toppings.
Side Dishes
These bars are rich, so I like to serve them with something light. A simple green salad or some grilled fruits work well. I also pair them with creamy iced matcha latte for a refreshing contrast.
Storage Instructions
Refrigerator: Store in an airtight container for up to 5 days. The bars will firm up in the fridge, which is actually preferable for slicing.
Freezing: These bars freeze well. Wrap them individually in plastic wrap and store in a freezer-safe bag for up to 3 months. Thaw in the refrigerator overnight.
Reheating: You don’t need to reheat these. They’re best at room temperature or chilled. If you want them warm, microwave for 10 seconds, but be careful not to melt the toppings.
Nutrition Information
I’m not a nutritionist, but here’s the breakdown if you’re tracking. These bars are indulgent, so enjoy them in moderation.
Per Serving (based on 12 servings):
- Calories: 220
- Protein: 2g
- Carbs: 32g
- Fiber: 1g
- Sugar: 20g
- Fat: 10g
- Saturated Fat: 6g
- Cholesterol: 25mg
- Sodium: 80mg
Look, this is a dessert. It’s not a health food. But it’s better than buying something from a bakery, and you know exactly what’s in it. When I make these for the kids, I use less sugar in the crust and skip the whipped cream. It’s still delicious.
Final Thoughts
So that’s my go-to Labor Day Banana Split Dessert Bars! I’ve probably talked your ear off at this point, but when you make a recipe this often, you have a lot to say about it. These bars have saved my summer parties more times than I can count. They’re my answer to “what’s for dessert” when I’m tired, don’t want takeout, and still want something that tastes really good. My kids are happy, my friends are happy, and I’m happy because I’m not stressed about cooking.
Make it yours! Try different toppings, swap in your favorite fruit, or adjust the sweetness. The best recipes are the ones you adapt to your family’s tastes. If you make this, drop a comment and let me know what you think! I love hearing how recipes turn out in your kitchen. And if something doesn’t work, tell me that too—I’m here to help troubleshoot.
Happy baking! And I hope your kitchen smells half as good as mine does right now.
Frequently Asked Questions
Can I use frozen bananas?
Yes, but you need to thaw them completely and drain any excess liquid. Frozen bananas release more water, which can make the bars soggy. If you use frozen bananas, I recommend adding an extra tablespoon of cornstarch to the banana layer.
Why did my banana layer turn out watery?
This usually happens if the bananas weren’t ripe enough or if you didn’t use enough cornstarch. Also, make sure you’re pressing the crust firmly into the pan. A loose crust can absorb moisture and become soggy.
Can I make these ahead of time?
Absolutely! In fact, they taste better the next day. Make them up to 3 days in advance and store them in the refrigerator. Add the whipped cream and cherries just before serving.
Can I freeze these bars?
Yes, they freeze well. Wrap them individually in plastic wrap and store in a freezer-safe bag for up to 3 months. Thaw in the refrigerator overnight. Note that the texture of the bananas may change slightly after freezing, but they’ll still be delicious.
Can I use milk instead of heavy cream?
You can, but the bars will be less rich and creamy. If you want to try it, use whole milk and add an extra tablespoon of cornstarch to thicken it. Half-and-half is a better middle ground.
How do I slice them neatly?
Use a sharp knife and wipe it clean between cuts. For extra neat slices, dip the knife in hot water and dry it before each cut. This prevents the banana layer from sticking to the knife.
Can I add nuts?
Yes, crushed walnuts or pecans add a nice crunch. I usually sprinkle them on top after adding the cherries. Just be aware that nuts can go rancid if stored for too long, so consume these within a few days if you add nuts.
Pin This Recipe!
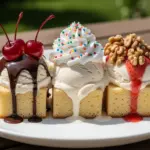
Labor Day Banana Split Dessert Bars
- Total Time: 50 minutes
- Yield: 12 servings 1x
Description
A sturdy, room-temperature stable dessert bar that captures the nostalgia of a classic banana split without the mess or melting issues. Perfect for summer parties, picnics, and tailgates.
Ingredients
- 1/2 cup (113g) unsalted butter, softened
- 1/4 cup (50g) granulated sugar
- 1 cup (125g) all-purpose flour
- 1/4 teaspoon salt
- 2 medium ripe bananas, mashed (about 1 cup)
- 1/2 cup (120ml) heavy cream
- 1 teaspoon vanilla extract
- 1 tablespoon cornstarch
- 1/2 cup (85g) semi-sweet chocolate chips
- 1 teaspoon coconut oil (for drizzle)
- Maraschino cherries, drained and patted dry
- Whipped cream (optional)
- Crushed nuts like walnuts or pecans (optional)
Instructions
- Preheat oven to 350°F (175°C). Line an 8×8 inch baking pan with parchment paper, leaving an overhang on two sides, and grease lightly.
- In a mixing bowl, cream together the softened butter and granulated sugar until light and fluffy (2-3 minutes).
- Add the flour and salt, mixing until just combined. Press the crumbly mixture firmly into the bottom of the prepared pan.
- Bake the crust for 10 minutes until lightly golden around the edges. Remove from oven and let cool for 5 minutes.
- In a medium bowl, mash the ripe bananas until smooth. Whisk in the heavy cream, vanilla extract, and cornstarch until well combined.
- Pour the banana mixture over the warm crust and spread evenly.
- Bake for 20 minutes until the banana layer is set and lightly golden on top. Let cool completely in the pan.
- Once cool, melt chocolate chips with coconut oil in the microwave in 30-second intervals, stirring in between.
- Drizzle melted chocolate over the bars in a zigzag pattern.
- Top with drained maraschino cherries and optional whipped cream or crushed nuts.
- Slice into 12-16 squares and serve.
Notes
Use heavily spotted ripe bananas for best sweetness and texture. Do not skip the cornstarch as it prevents the banana layer from becoming watery. Cool the bars completely before slicing to ensure they hold their shape. For neat slices, wipe the knife clean between cuts or dip in hot water.
- Prep Time: 20 minutes
- Cook Time: 30 minutes
- Category: Dessert
- Cuisine: American
Nutrition
- Serving Size: 1 bar
- Calories: 220
- Sugar: 20
- Sodium: 80
- Fat: 10
- Saturated Fat: 6
- Carbohydrates: 32
- Fiber: 1
- Protein: 2
Keywords: banana split, dessert bars, labor day dessert, summer party treats, easy dessert, make-ahead dessert, banana bars