I still remember the exact moment I fell in love with Thai coconut sticky rice. I was sitting on a plastic stool on a sidewalk in Bangkok, the air thick and humid, smelling of lemongrass, exhaust, and frying chilies. It was 9 PM, and my stomach was rumbling louder than the tuk-tuks zipping past me. I didn’t speak Thai, and my phone was dead, so I just pointed at the steaming basket in front of the elderly woman cooking.
She handed me a small banana leaf boat filled with warm, purple-black sticky rice, drizzled with a pale yellow coconut sauce that smelled like heaven. On the side, she placed two perfect slices of ripe mango. I took one bite, and everything else just… stopped. The contrast was insane—the salty, savory warmth of the coconut rice against the sweet, floral burst of the mango. It wasn’t heavy like a cake, and it wasn’t cloying like a donut. It felt light, balanced, and somehow deeply comforting all at once.
When I got back home, I tried to recreate it. And I failed. Miserably. I used regular long-grain rice because I didn’t know the difference. I used canned coconut milk straight from the tin, which made it greasy and weird. I bought mangoes that were rock hard and sour. It took me about six attempts before I finally got it right. But once I did? I made it three times in one week.
This Thai coconut sticky rice with mango is my answer to “what’s for dessert?” when I want something that feels fancy but takes zero stress. It’s genuinely a three-ingredient magic trick (okay, four if you count salt, but really, it’s three). I’ve been making this for friends, for potlucks, and just for myself on lazy Sunday nights. It’s the kind of dessert that makes people ask for the recipe five minutes after they finish eating. And honestly? It’s so easy that you’ll feel like a culinary genius.
Why You’ll Love This Recipe
There are plenty of desserts out there, but few offer the specific texture and flavor profile that this one does. Here’s why this Thai coconut sticky rice with mango has earned a permanent spot in my dessert rotation:
- It’s Actually Healthy(ish) — I know, I know. It has coconut milk. But compared to a slice of cheesecake or a plate of cookies, this is relatively light. It’s naturally gluten-free and dairy-free, which means almost everyone can eat it. I serve this when I want to treat myself without feeling guilty for the rest of the evening.
- Three Ingredients, Maximum Flavor — Seriously. Glutinous rice, coconut milk, sugar. That’s it. No weird thickeners, no baking powder, no egg whites to whip. Just simple ingredients that do exactly what they’re supposed to do. If you can boil water, you can make this.
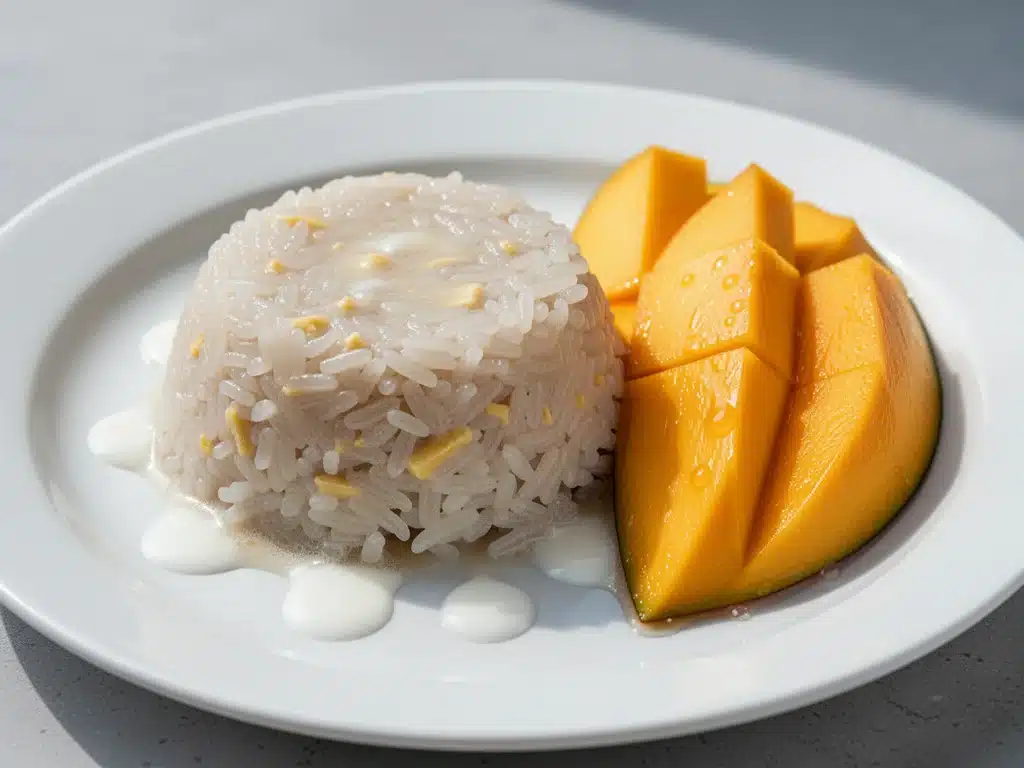
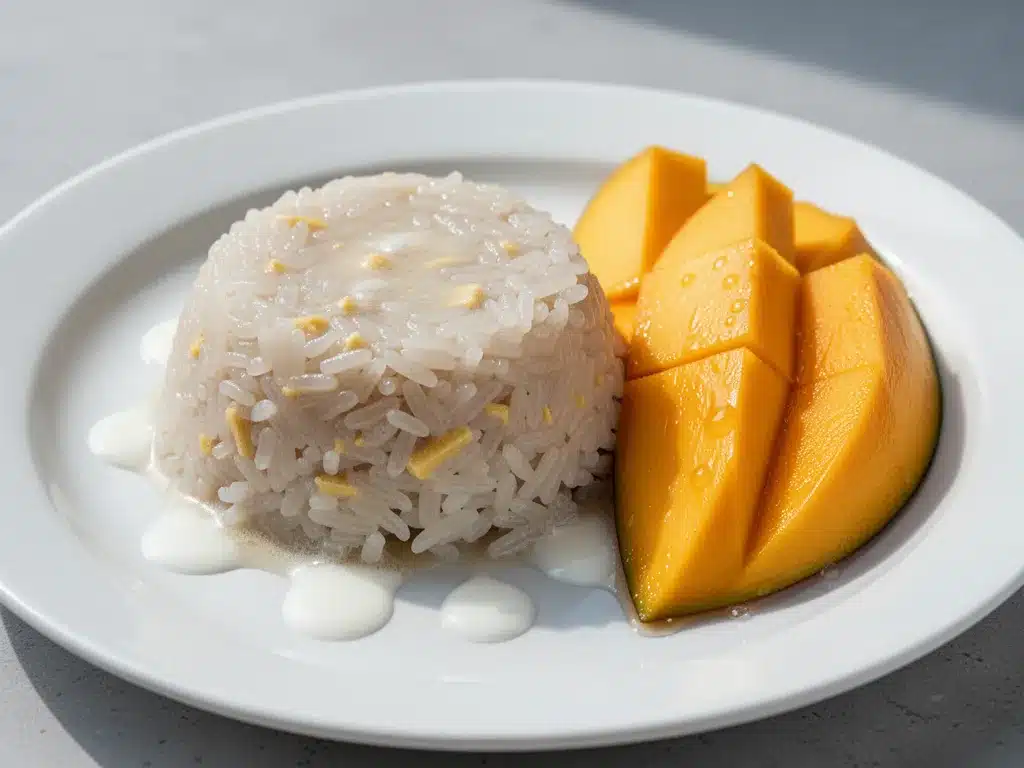
- Makes You Look Like a Pro — It looks incredibly elegant on a plate. The way the golden coconut sauce pools around the dark sticky rice and bright mango slices? It looks like something you’d get at a high-end Thai restaurant for $12. But it costs about $4 to make.
- Ready in 20 Minutes — Okay, the rice needs to soak for a few hours, but active cooking time is basically nothing. You just steam it. While it steams, you make the sauce. I can throw this together after dinner while I’m cleaning up, and it’s ready by the time dessert plates are cleared.
- Perfectly Balanced — This is the key. Thai desserts are all about balance. Salty, sweet, savory, fresh. The salt in the coconut sauce cuts through the sweetness of the mango, and the tartness of the fruit cuts through the richness of the coconut. It’s a flavor explosion in every bite.
So basically, if you want a dessert that’s easy, impressive, and actually tastes like summer, this is it. I’ve made this for keto friends (with modifications, check below) and it’s always a hit. It’s my go-to when I need to bring a dish to a dinner party that doesn’t require an oven and won’t burn my house down.
Ingredients You’ll Need
Here’s the best part: you probably don’t need to go to a specialty store for most of this. But there is one critical ingredient you need to get right, or the whole thing falls apart. Let’s break it down.
The Star of the Show
Glutinous Rice (2 cups / 400g) — This is NOT regular rice. Do not use jasmine rice, do not use white rice, do not use brown rice. You need short-grain glutinous rice, also called sweet rice or sticky rice. It’s high in amylopectin, which gives it that chewy, sticky texture. You can find this in the Asian section of most grocery stores (look for brands like Lotus or Thai Hom Mali) or at an Asian market. It’s cheap, so buy a big bag—it keeps forever.
The Sauce Base
Full-Fat Coconut Milk (1 can / 400ml) — Do not buy the carton stuff labeled “light” or “beverage.” You need the canned version. Shake it well before opening. The thick cream at the top is what you want for the sauce. If you buy a can that’s separated, that’s perfect. I like to use the cream for the sauce and save the thinner liquid for my creamy iced matcha latte or soups.
Sugar (1/3 cup / 70g) — White granulated sugar works best because it dissolves easily. Palm sugar is traditional and has a deeper, caramel-like flavor, but white sugar is easier to find and tastes fine. If you want a healthier swap, coconut sugar works too, but it will darken the sauce.
Salt (1/2 teaspoon) — This is non-negotiable. The salt balances the sweetness and brings out the coconut flavor. Don’t skip it.
The Fruit
Ripe Mangoes (2 large) — This is where the magic happens. You need mangoes that are ripe, juicy, and sweet. Look for Ataulfo (also called Honey mangoes) or Alphonso mangoes—they are less fibrous and sweeter than the big Tommy Atkins ones. They should yield slightly to pressure but not be mushy. If they’re not ripe yet, let them sit on the counter for 2-3 days. You can’t rush the mango.
Optional Garnish
Toasted Sesame Seeds (1 tablespoon) — Adds a nice nutty crunch and visual appeal. I toast them in a dry pan for 2 minutes. It’s a small step but makes it look restaurant-quality.
Edible Flowers — Just for looks. I use pansies or violets if I’m feeling fancy. But honestly, a sprinkle of sesame seeds is all you need.
Equipment Needed
You don’t need fancy gadgets for this. Here’s what I actually use:
Bamboo Steamer — This is the traditional tool. It’s inexpensive (I got mine for $15) and works perfectly. It fits over a pot and lets the steam circulate evenly. If you don’t have one, see below.
Large Pot with Lid — If you don’t have a steamer, you can use a large pot with a tight-fitting lid. You’ll need to create a rack. I use a metal trivet or even a crumpled piece of aluminum foil to keep the rice basket off the bottom of the pot.
Small Saucepan — For heating the coconut milk and sugar. Any small pan works.
Sharp Knife — For slicing the mango. A dull knife will mash the fruit. Learn to slice around the pit.
Measuring Cups and Spoons — Standard stuff. Dollar store versions are fine.
Banana Leaves (Optional) — For serving. They add a beautiful presentation and a subtle herbal aroma. You can buy them frozen at Asian markets. If you don’t have them, small plates or bowls work fine. Just don’t serve it on a wooden cutting board—it’ll look messy.
How to Make It: Step-by-Step
Alright, let’s make this! I’m walking you through exactly how I do it, including the little tricks I’ve picked up so you don’t end up with gummy, mushy rice.
Step 1: Soak the Rice (The Most Important Step)
Rinse the glutinous rice under cold water until the water runs clear. This removes excess starch. Then, place the rice in a bowl and cover with plenty of cold water. Let it soak for at least 4 hours, or ideally overnight. I know it’s tempting to skip this, but if you don’t soak it, the rice will be hard in the middle and chewy in a bad way. Soaking ensures it cooks evenly and gets that perfect tender-chewy texture. If you’re in a huge hurry, you can soak it in hot water for 1 hour, but cold soak is better.
Step 2: Steam the Rice
Drain the soaked rice. Line your bamboo steamer with a piece of cheesecloth or a banana leaf (if using). This prevents the rice from falling through the gaps. Place the rice in the steamer, spreading it out evenly. Don’t pack it down.
Bring about 2 inches of water to a boil in your large pot. Place the steamer basket over the pot. Cover with the lid. Steam for 20-25 minutes. Do not peek! The steam needs to stay consistent. After 15 minutes, check the rice. It should be translucent and tender. If it’s still white and hard in the center, steam for another 5-10 minutes. If it’s mushy, you steamed it too long (rare, but possible if the rice was over-soaked).
Once cooked, remove the steamer and spread the rice on a tray or plate to cool slightly. It will continue to firm up as it cools.
Step 3: Make the Coconut Sauce
While the rice is steaming, make the sauce. Pour the coconut milk into a small saucepan over medium-low heat. Add the sugar and salt. Whisk gently until the sugar is completely dissolved. Do not let it boil vigorously—just warm it through until it’s hot and smooth. This should take about 3-4 minutes. Taste it. It should be sweet and salty. If you want it sweeter, add a bit more sugar. If you want more coconut flavor, you can add a splash of coconut cream (the thick stuff from the top of the can).
Remove from heat and set aside. It will thicken slightly as it cools.
Step 4: Slice the Mangoes
While the rice and sauce are doing their thing, prepare the mangoes. Wash them. Stand the mango upright on a cutting board. Slice down along one side of the pit, following the curve. Do the same on the other side. You’ll have two “cheeks” of mango and the middle section with the pit.
For the cheeks, score the flesh in a crosshatch pattern (don’t cut through the skin). Then, push the skin inside out to create a “hedgehog” effect. Slice the cubes off the skin. For the middle section, just slice off whatever flesh you can. Arrange the mango slices on a plate or banana leaf. They should be fanned out or stacked neatly.
Step 5: Assemble and Serve
Take a portion of the warm sticky rice (about 1/2 cup) and shape it into a mound or a flat disc on a small plate. Place it next to or on top of the mango slices. Drizzle the warm coconut sauce generously over the rice. The rice should absorb some of the sauce, but there should be a little pool at the bottom. Sprinkle with toasted sesame seeds if using.
Serve immediately while the rice is still warm. The contrast of warm rice and cool mango is what makes this dish special.
Expert Tips & Tricks
Here’s everything I’ve learned from making this dozens of times. These tips will save you from my mistakes.
Don’t Boil the Coconut Milk — High heat can cause the coconut milk to separate and become oily. Keep it on medium-low heat. Gentle warmth is key.
The Rice Should Be Warm, Not Hot — When you serve it, the rice should be warm to the touch. If it’s scalding, it will melt the mango too fast. Let it sit for 5 minutes after steaming.
Use Ripe Mangoes — I cannot stress this enough. If your mangoes are tart, the dessert will taste weird. Wait for them to be perfectly ripe. They should smell sweet at the stem end.
Leftover Rice? — Sticky rice reheats beautifully. Store it in an airtight container in the fridge for up to 3 days. To reheat, sprinkle a little water on it and microwave for 30 seconds, or steam it again for 5 minutes. It will be soft and chewy again.
Too Much Sauce? — Start with less sauce. You can always add more, but you can’t take it away. The rice absorbs the sauce, so if you add too much, it becomes soggy.
Variations & Substitutions
Once you’ve nailed the basic version, here’s how you can mix it up. I’ve tried all of these.
Blue Sticky Rice — You can buy natural blue sticky rice (dyed with butterfly pea flower). It’s stunning and tastes exactly the same. Just look for bags labeled “blue sticky rice.”
Durian Sticky Rice — This is a classic in Thailand. If you can handle the strong smell and taste of durian, swap the mango for durian flesh. It’s an acquired taste, but delicious if you love it.
Taro or Pumpkin — Instead of mango, serve the rice with steamed taro root or pumpkin cubes. Drizzle with the same coconut sauce. It’s heartier and less sweet.
Keto Version — I’ve made this for keto friends. Use erythritol or monk fruit sweetener instead of sugar. Use full-fat coconut milk but reduce the amount slightly since it’s richer. For the rice, regular glutinous rice is high in carbs, so some people substitute it with a mix of cauliflower rice and coconut flour, but the texture is different. Honestly, I just make a small portion for keto friends and let them enjoy the mango.
Vegan — This recipe is naturally vegan! Just ensure your sugar is vegan-friendly (some white sugar is processed with bone char, but organic sugar is always vegan).
Serving & Storage
How to Serve: I usually serve this on small individual plates or banana leaves. It looks rustic and beautiful. Add a sprig of mint or a sprinkle of sesame seeds for color.
Side Dishes: This is a dessert, so it doesn’t need sides. But if you’re making a Thai feast, it pairs well with spicy dishes like vegan coconut chickpea curry because the sweetness balances the heat.
Storage: Store leftover rice in an airtight container in the fridge for up to 3 days. Store the coconut sauce in a separate jar. Do not freeze the rice—it becomes hard and crumbly when thawed. The mango should be eaten fresh.
Reheating: Reheat the rice in the microwave with a splash of water, or steam it. Warm the coconut sauce gently. Do not microwave the sauce, or it will separate.
Nutrition Information
I’m not a nutritionist, but here’s the breakdown if you’re tracking. This is per serving (based on 4 servings).
- Calories: 320
- Protein: 4g
- Carbs: 58g
- Fiber: 3g
- Sugar: 35g
- Fat: 10g
- Saturated Fat: 8g
What’s Good: It’s dairy-free and gluten-free. It provides some potassium from the mango and healthy fats from the coconut. It’s a lighter dessert option compared to cakes or pies.
What to Know: It is high in natural sugars from the mango and added sugar. The coconut milk is high in saturated fat, but it’s plant-based. If you’re watching carbs, keep your portion size in mind. One serving is a reasonable treat.
Final Thoughts
So that’s my Thai coconut sticky rice with mango! I’ve probably talked your ear off at this point, but when you make a recipe this often, you have a lot to say about it.
This has saved my dessert game more times than I can count. It’s my answer to “what’s for dessert?” when I want something that feels special but doesn’t require a lot of effort. My friends are always impressed, and I’m always happy because I’m not stuck in the kitchen for hours.
Make it yours! Try different fruits like strawberries or raspberries in the summer. Use blue sticky rice for a fun twist. The best recipes are the ones you adapt to your tastes.
If you make this, drop a comment and let me know what you think! I love hearing how recipes turn out in your kitchen. And if something doesn’t work, tell me that too—I’m here to help troubleshoot.
Happy cooking! And I hope your kitchen smells half as good as mine does right now.
Frequently Asked Questions
Can I use regular white rice instead of glutinous rice?
No, you can’t. Regular rice (jasmine, long-grain, etc.) doesn’t have the same starch content. It will be fluffy and separate, not sticky and chewy. You need glutinous (sweet) rice for this recipe. It’s easy to find in most grocery stores now.
Why did my rice turn out mushy?
Most likely, you over-soaked it or steamed it too long. Glutinous rice only needs 20-25 minutes of steaming. If it’s mushy, it’s still edible, but the texture won’t be right. Next time, try soaking for only 4 hours instead of overnight, and check it at 15 minutes.
Can I make the coconut sauce ahead of time?
Yes! Make the sauce up to 2 days ahead and store it in the fridge. Reheat it gently before serving. It will thicken in the fridge, so you may need to add a splash of water or coconut milk to thin it out.
Why did my coconut sauce separate?
The heat was too high. Coconut milk can break if boiled vigorously. Keep it on medium-low heat and whisk gently. If it does separate, you can try whisking in a little water to bring it back together, but it’s not always perfect.
Can I freeze this dessert?
I don’t recommend freezing the rice. It becomes hard and loses its chewy texture. The sauce can be frozen, but it may separate when thawed. It’s best to make this fresh.
What kind of mango is best?
Ataulfo (Honey) mangoes are the best because they are sweet, less fibrous, and have a buttery texture. Alphonso mangoes are also excellent. Avoid large, fibrous mangoes like Tommy Atkins, as they can be stringy and less sweet.
Is this recipe gluten-free?
Yes! Glutinous rice is naturally gluten-free (the name is misleading—it doesn’t contain gluten). Just ensure your sugar and coconut milk are certified gluten-free if you have celiac disease.
Pin This Recipe!
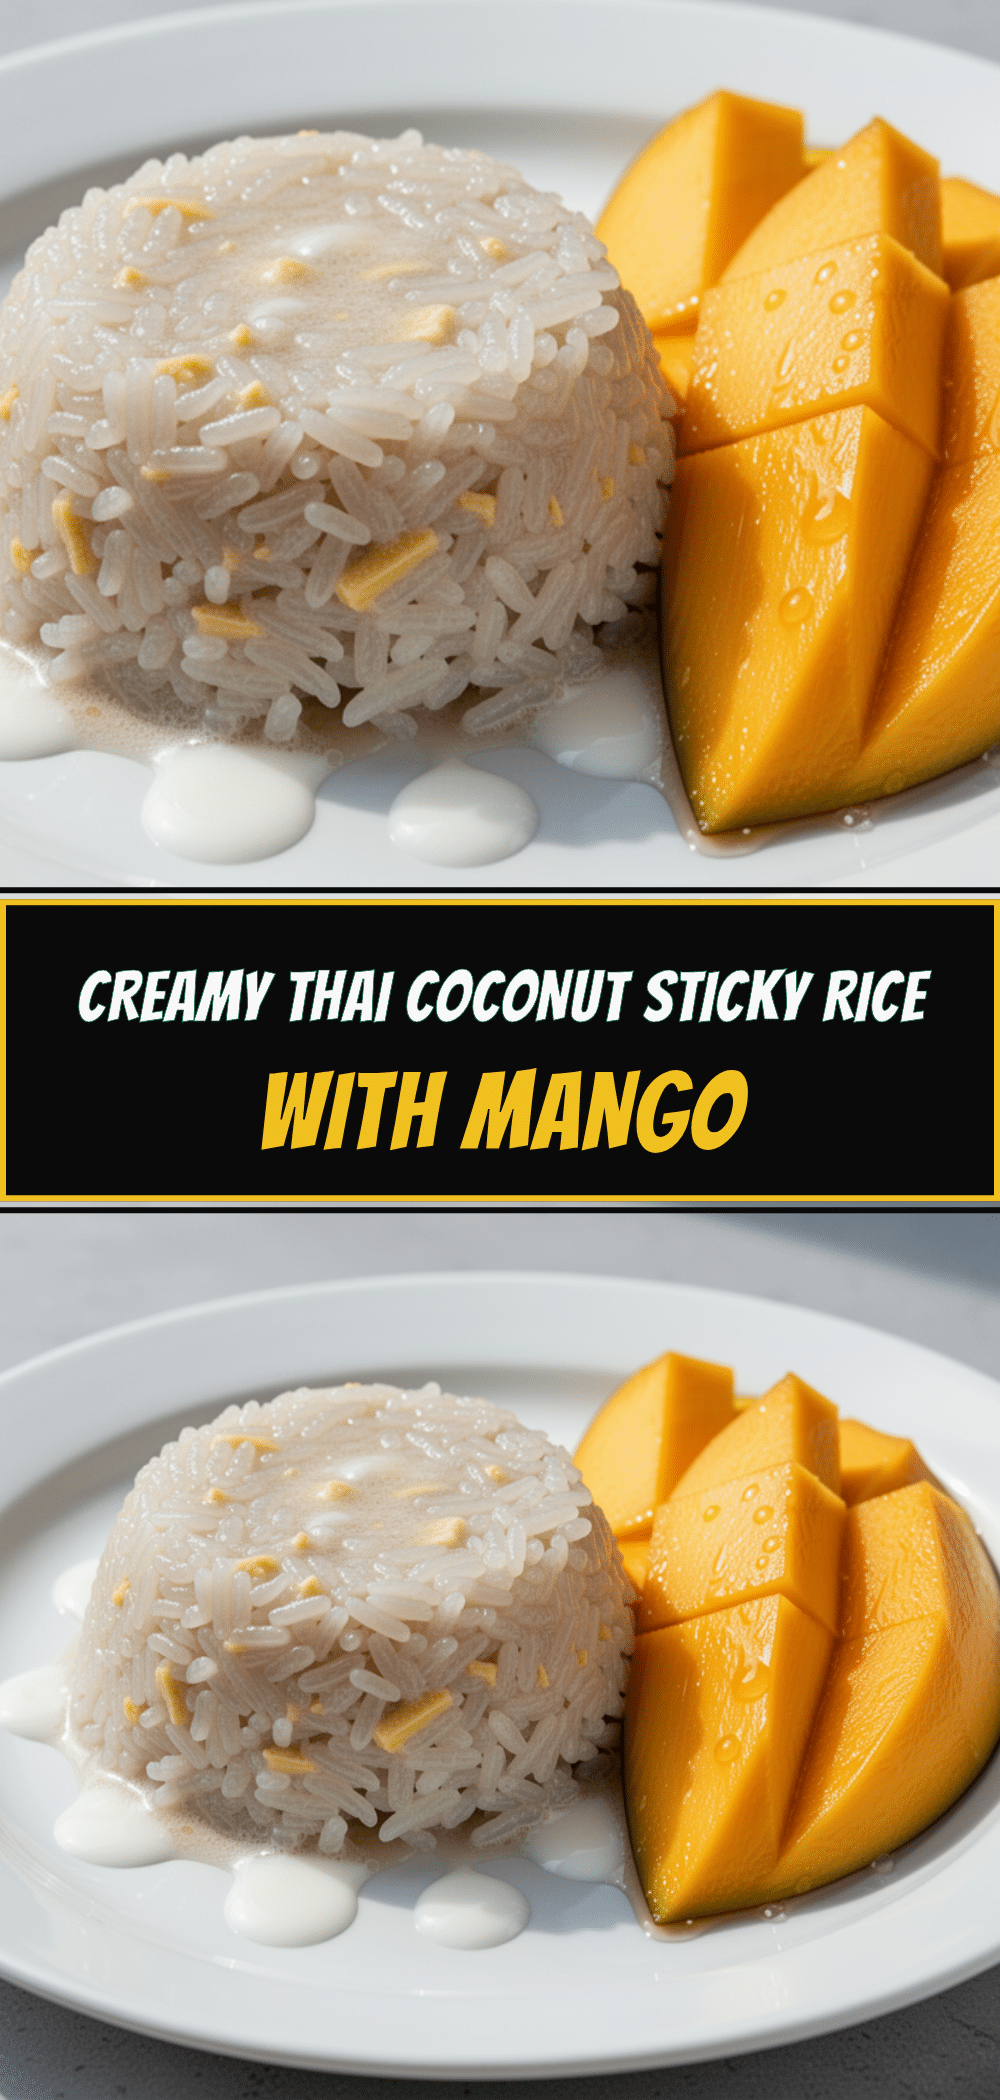
Thai Coconut Sticky Rice: Easy 3-Ingredient Mango Dessert
- Total Time: 4 hours 25 minutes
- Yield: 4 servings 1x
Description
A light, balanced, and comforting Thai dessert featuring warm, chewy glutinous rice drizzled with a sweet and salty coconut sauce, served with ripe mango slices. This easy recipe requires only a few simple ingredients and steaming.
Ingredients
- 2 cups (400g) glutinous rice (sweet/sticky rice)
- 1 can (400ml) full-fat coconut milk
- 1/3 cup (70g) white granulated sugar (or palm/coconut sugar)
- 1/2 teaspoon salt
- 2 large ripe mangoes (Ataulfo/Honey or Alphonso)
- 1 tablespoon toasted sesame seeds (optional garnish)
Instructions
- Rinse the glutinous rice under cold water until clear. Soak in plenty of cold water for at least 4 hours or overnight.
- Drain the rice. Line a bamboo steamer with cheesecloth or a banana leaf. Spread the rice evenly in the steamer basket.
- Bring 2 inches of water to a boil in a large pot. Place the steamer over the pot, cover, and steam for 20-25 minutes until the rice is translucent and tender. Let cool slightly.
- While rice steams, pour coconut milk into a small saucepan over medium-low heat. Add sugar and salt, whisking gently until dissolved and warm (do not boil). Set aside.
- Slice the mangoes: cut cheeks off the pit, score the flesh in a crosshatch pattern, push skin inside out, and slice cubes off. Arrange on plates.
- Shape warm sticky rice into mounds or discs. Place next to or on mango slices. Drizzle generously with warm coconut sauce. Sprinkle with sesame seeds if using. Serve immediately.
Notes
Do not use regular long-grain rice; glutinous rice is essential for the correct texture. Ensure mangoes are fully ripe and sweet. Do not boil the coconut milk vigorously to prevent separation. Leftover rice can be stored in the fridge for 3 days and reheated with a splash of water.
- Prep Time: 4 hours (soaking time)
- Cook Time: 25 minutes
- Category: Dessert
- Cuisine: Thai
Nutrition
- Serving Size: 1/2 cup sticky rice
- Calories: 320
- Sugar: 35
- Fat: 10
- Saturated Fat: 8
- Carbohydrates: 58
- Fiber: 3
- Protein: 4
Keywords: Thai dessert, sticky rice, mango sticky rice, coconut rice, gluten-free dessert, vegan dessert, easy dessert, 3-ingredient recipe